
Introduction
In a previous post, I walked through the process of creating an Azure Active Directory tenant that can be managed by a Sitecore development team. Today, I’ll continue this thread by walking through two key concepts:
- Setting up your team in Active Directory
- Configuring Sitecore Identity with your Active Directory tenant
I’m approaching this post from the perspective of a development team that may need to quickly standup several instances of Sitecore to support multiple streams of project work. The idea is to create standardized, repeatable environments that only require one-time creation of users and permissions. For this reason, I’m leaving client stakeholders out of this initial setup process.
App Registration
Multiple apps can be registered with Azure Active Directory. This would allow a development team to register multiple instances of Sitecore with an Active Directory tenant. The steps for creating the registration are as follows:
-
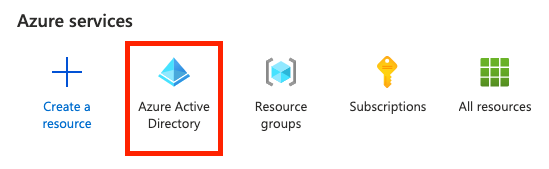
Visit the Azure Portal
-
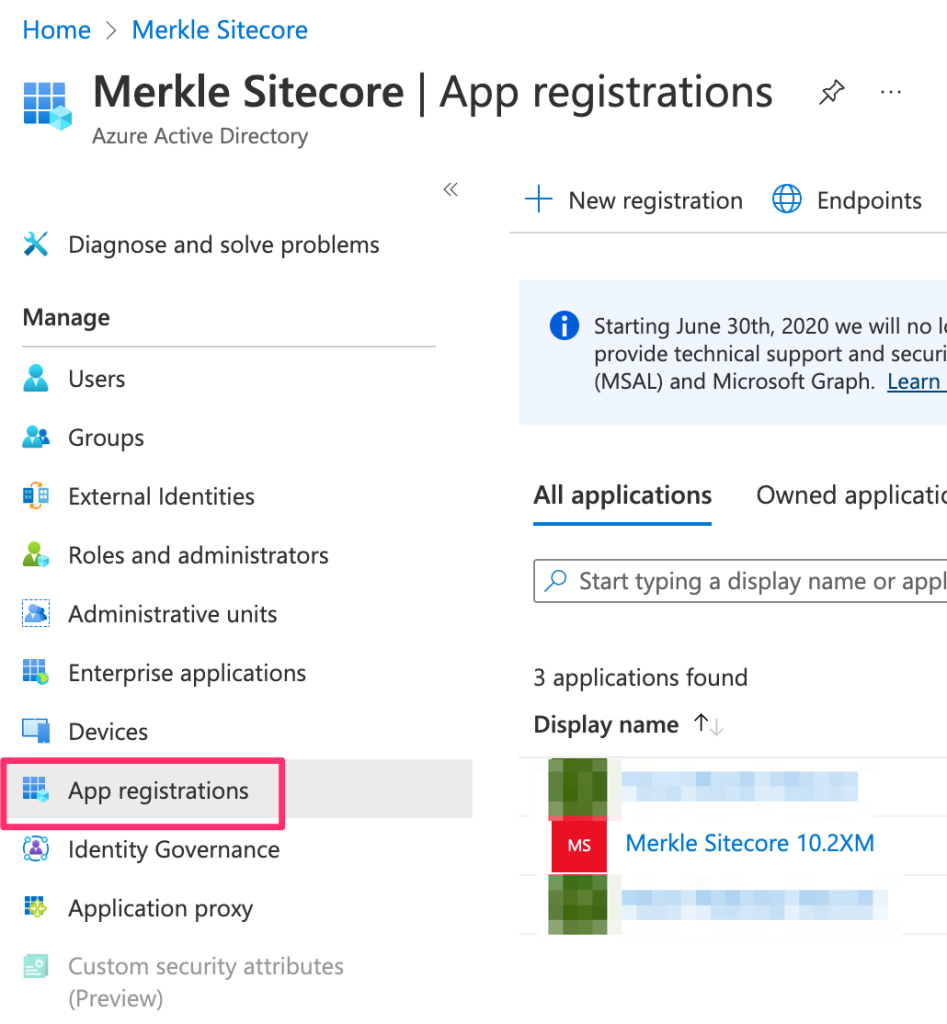
Accessing your Azure Active Directory tenant is different from a standard Azure resource. You can find it on your Home screen
or visit this url: https://portal.azure.com/#blade/Microsoft_AAD_IAM/ActiveDirectoryMenuBlade/Overview
-
Select ‘App Registrations’
-
Enter a name for the App and the redirect URI in this format:
https://{{SitecoreIdentityHost}}/signin-oidc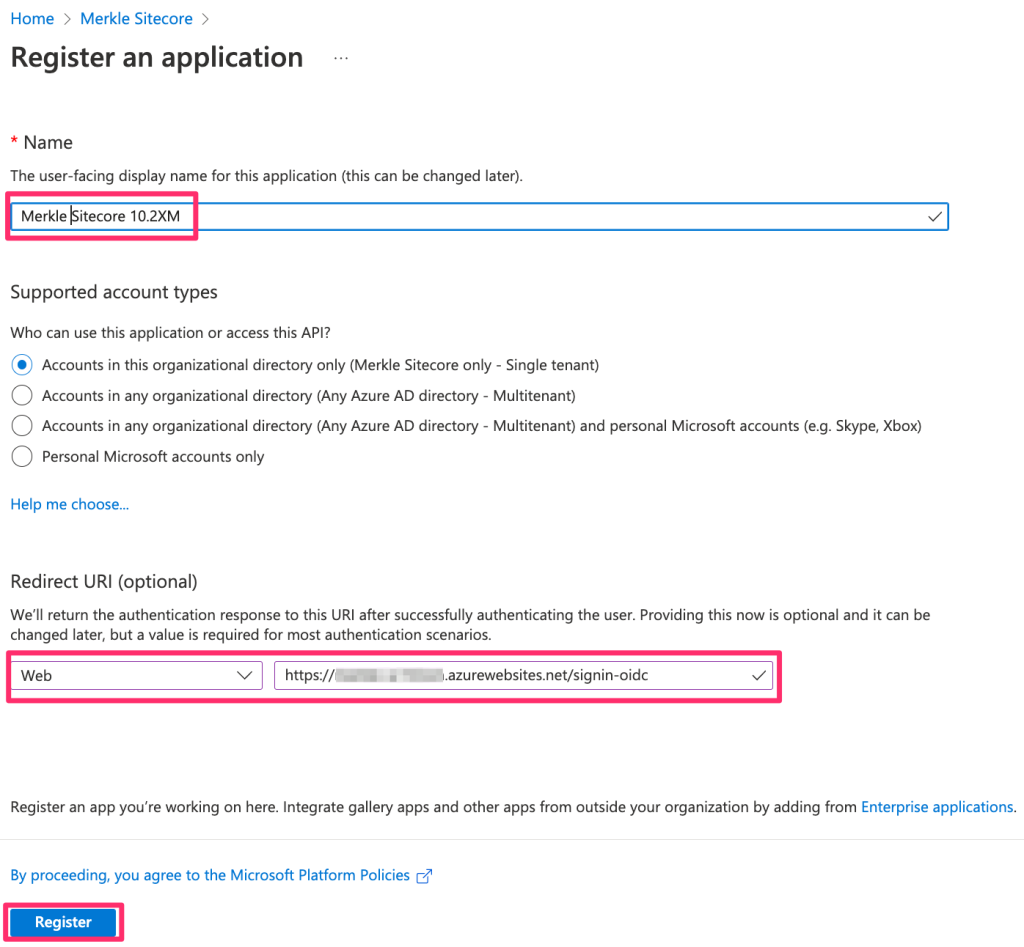
-
Click ‘Register’
-
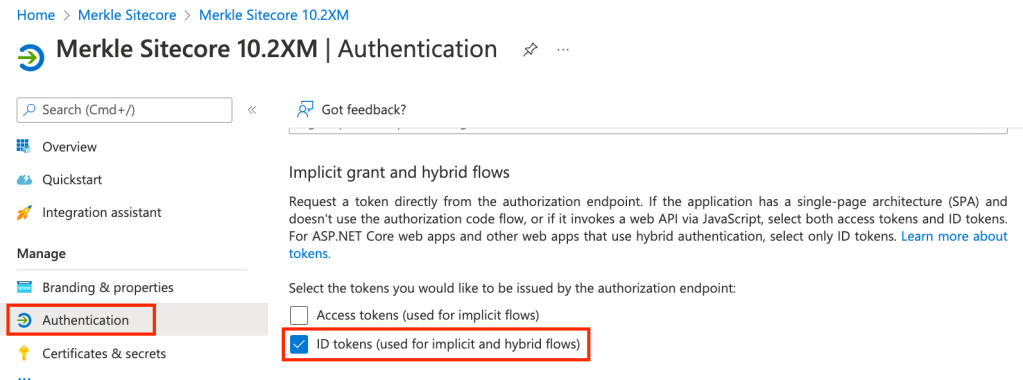
Select ‘Authentication’ and make sure that the ‘ID Tokens…’ checkbox is checked
-
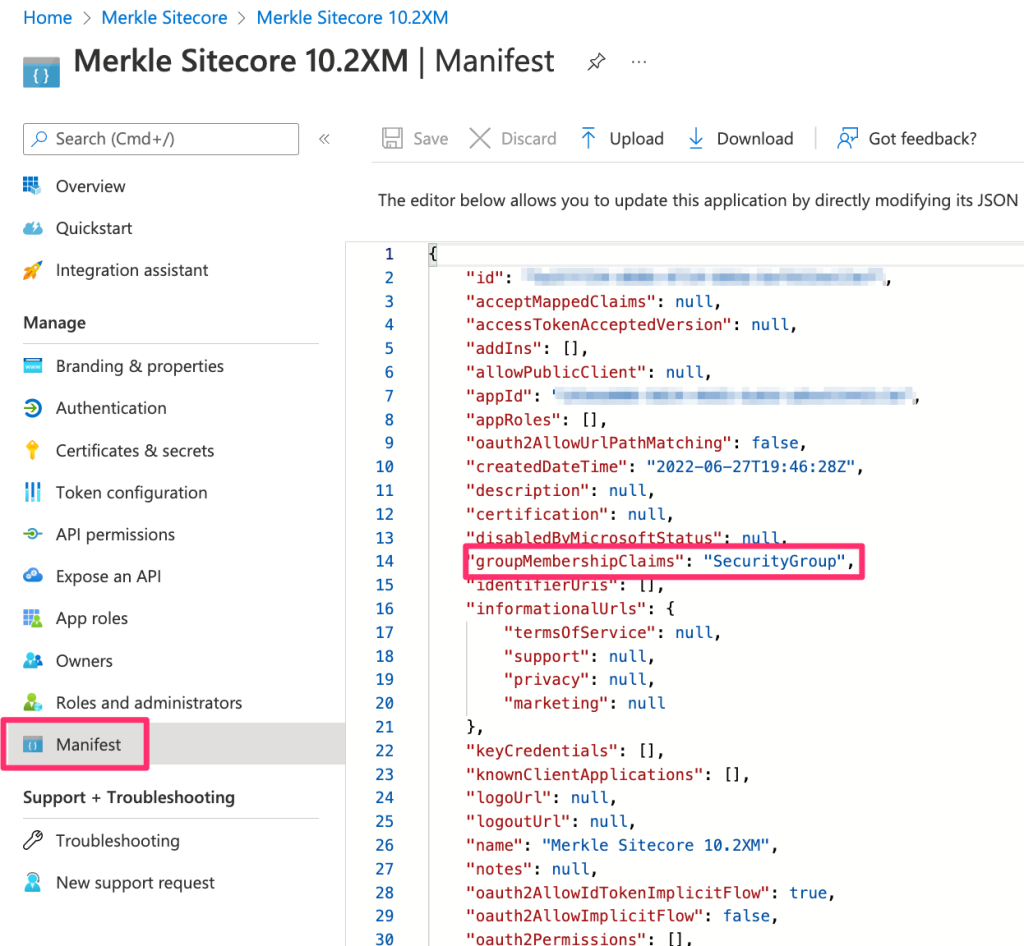
Select ‘Manifest’, which opens a Json document. Update the ‘groupMembershipClaims’ attribute value to: ‘SecurityGroup’
-
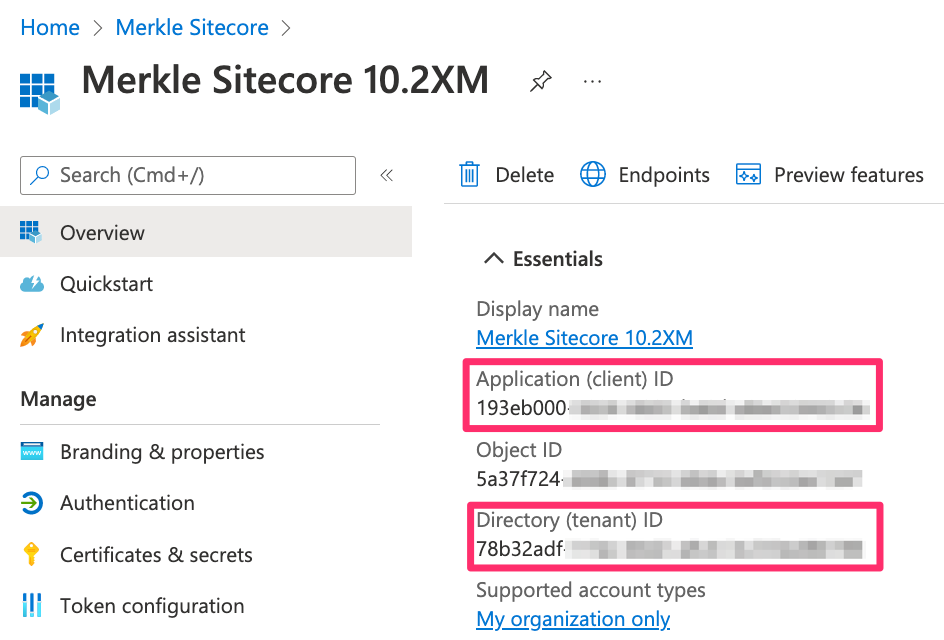
Under the ‘Overview’ section, note the ‘Application (client) ID’ and ‘Directory (tenant) ID’. These are crucial for configuring Sitecore Identity.
Team Setup
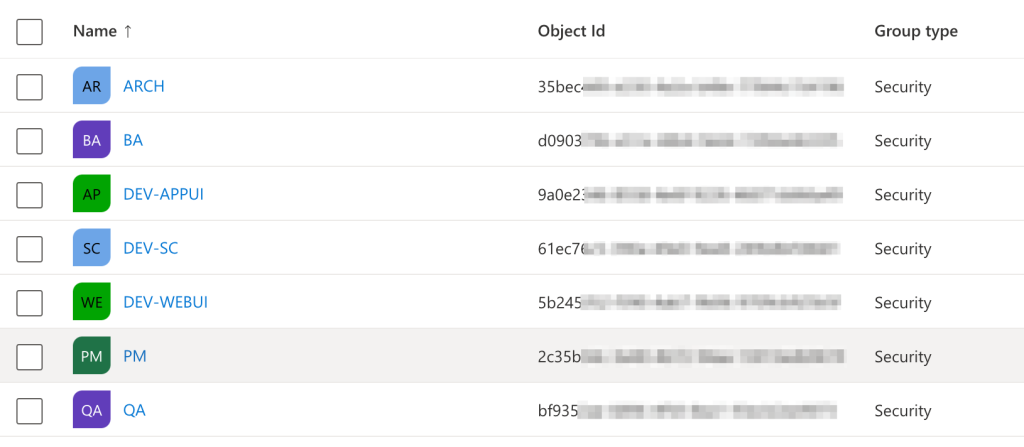
Every Sitecore development team is different. Some teams are comprised of developers only. Others are fully scaled-out with architects, development (FED, BED, Sitecore), QA, Business Analysts and Project Management. I’m going to setup my Active Directory groups to mimic the structure of my team. If you have a different structure, please use this as a guide and not a prescriptive solution.
Security Groups
The first thing we’ll do is create Security Groups in Active Directory that will map to Sitecore user roles.
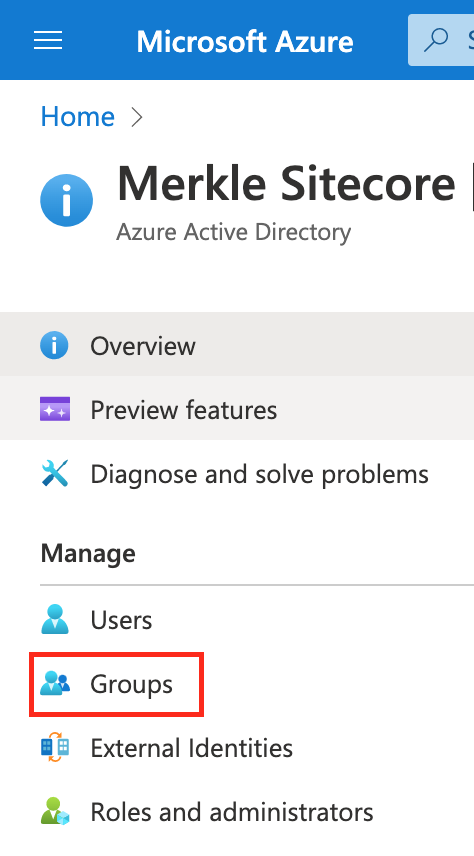
- Open the Active Directory tenant again
- Select ‘Groups’
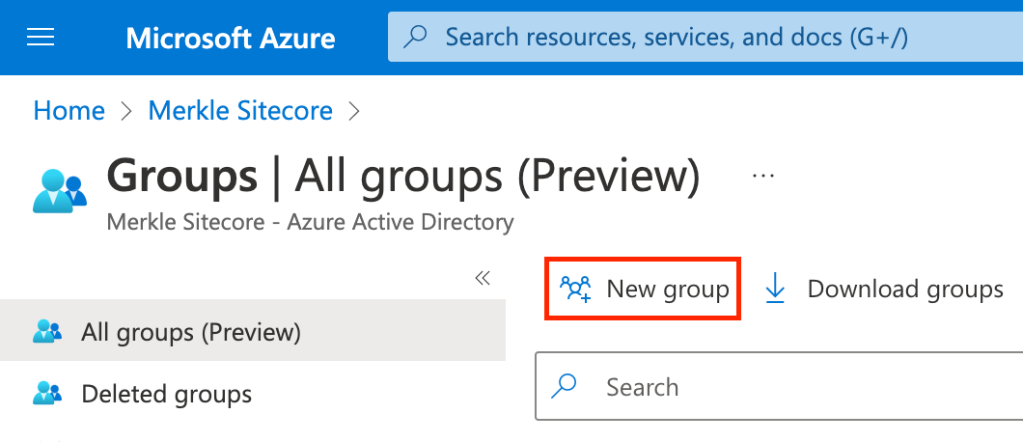
- Select ‘New Group’
- Enter the Group Name and Group Description and click ‘Create’

- Make sure to document the Group name and ObjectID of each group as they are created. You’ll need these for role mapping in Sitecore.
Sitecore Identity Configuration
Now that your groups are created, it is time to configure Sitecore Identity with the claims transformations for each group. These transformations will map the objectId of the SecurityGroup to a role in Sitecore. I’m using Sitecore Identity 6.0.0, which can be found here:
If you download the WDP installation package and unzip it, you’re looking for this file:
.\Content\Website\sitecore\Sitecore.Plugin.IdentityProvider.AzureAd\Config\Sitecore.Plugin.IdentityProvider.AzureAd.xml
For simplicity, we’re going to assign the ARCH and DEV-SC Security Groups as Sitecore Admins and the other groups will be Content Authors. My templated configuration file looks like this:
<?xml version="1.0" encoding="utf-8"?>
<Settings>
<Sitecore>
<ExternalIdentityProviders>
<IdentityProviders>
<AzureAd type="Sitecore.Plugin.IdentityProviders.IdentityProvider, Sitecore.Plugin.IdentityProviders">
<AuthenticationScheme>IdS4-AzureAd</AuthenticationScheme>
<DisplayName>Azure AD</DisplayName>
<Enabled>true</Enabled>
<ClientId>{Enter Client Id}</ClientId>
<TenantId>{Enter Tenant Id}</TenantId>
<MetadataAddress></MetadataAddress>
<ClaimsTransformations>
<!–Place transformation rules here. –>
<ClaimsTransformation1 type="Sitecore.Plugin.IdentityProviders.DefaultClaimsTransformation, Sitecore.Plugin.IdentityProviders">
<SourceClaims>
<Claim1 type="http://schemas.xmlsoap.org/ws/2005/05/identity/claims/upn" />
</SourceClaims>
<NewClaims>
<Claim1 typ="email" />
</NewClaims>
</ClaimsTransformation1 >
<ClaimsTransformation2 typ="Sitecore.Plugin.IdentityProviders.DefaultClaimsTransformation, Sitecore.Plugin.IdentityProviders">
<SourceClaims>
<Claim1 typ="http://schemas.xmlsoap.org/ws/2005/05/identity/claims/emailaddress" />
</SourceClaims>
<NewClaims>
<Claim1 type="email" />
</NewClaims>
</ClaimsTransformation2>
<!–Transformation samples–>
<!–AzureAD user group to Sitecore role transformation.–>
<BusinessAnalystTransformation type="Sitecore.Plugin.IdentityProviders.DefaultClaimsTransformation, Sitecore.Plugin.IdentityProviders">
<SourceClaims>
<BusinessAnalyst type="groups" value="d090379b-XXXX-XXXX-XXXX-XXXXXXXXXXXX" />
</SourceClaims>
<NewClaims>
<Claim1 type="role" value="sitecore\Author" />
</NewClaims>
</BusinessAnalystTransformation>
<ProjectManagerTransformation type="Sitecore.Plugin.IdentityProviders.DefaultClaimsTransformation, Sitecore.Plugin.IdentityProviders">
<SourceClaims>
<ProjectManager type="groups" value="2c35b54c-XXXX-XXXX-XXXX-XXXXXXXXXXXX" />
</SourceClaims>
<NewClaims>
<Claim1 type="role" value="sitecore\Author" />
</NewClaims>
</ProjectManagerTransformation>
<QualityAssuranceTransformation type="Sitecore.Plugin.IdentityProviders.DefaultClaimsTransformation, Sitecore.Plugin.IdentityProviders">
<SourceClaims>
<QualityAssurance type="groups" value="bf9352ae-XXXX-XXXX-XXXX-XXXXXXXXXXXX" />
</SourceClaims>
<NewClaims>
<Claim1 type="role" value="sitecore\Author" />
</NewClaims>
</QualityAssuranceTransformation>
<WebUITransformation type="Sitecore.Plugin.IdentityProviders.DefaultClaimsTransformation, Sitecore.Plugin.IdentityProviders">
<SourceClaims>
<WebUI type="groups" value="5b245352-XXXX-XXXX-XXXX-XXXXXXXXXXXX" />
</SourceClaims>
<NewClaims>
<Claim1 type="role" value="sitecore\Author" />
</NewClaims>
</WebUITransformation>
<AppUITransformation type="Sitecore.Plugin.IdentityProviders.DefaultClaimsTransformation, Sitecore.Plugin.IdentityProviders">
<SourceClaims>
<AppUI type="groups" value="9a0e2346-XXXX-XXXX-XXXX-XXXXXXXXXXXX" />
</SourceClaims>
<NewClaims>
<Claim1 type="role" value="sitecore\Author" />
</NewClaims>
</AppUITransformation>
<!–AzureAD user in specific group to Sitecore admin user transformation–>
<ArchTransformation type="Sitecore.Plugin.IdentityProviders.DefaultClaimsTransformation, Sitecore.Plugin.IdentityProviders">
<SourceClaims>
<Arch type="groups" value="35bec449-XXXX-XXXX-XXXX-XXXXXXXXXXXX" />
</SourceClaims>
<NewClaims>
<Claim1 type="http://www.sitecore.net/identity/claims/isAdmin" valu="true"/>
</NewClaims>
</ArchTransformation>
<SitecoreDeveloperTransformation typ="Sitecore.Plugin.IdentityProviders.DefaultClaimsTransformation, Sitecore.Plugin.IdentityProviders">
<SourceClaims>
<SitecoreDeveloper typ="groups" valu="61ec76c5-XXXX-XXXX-XXXX-XXXXXXXXXXXX" />
</SourceClaims>
<NewClaims>
<Claim1 typ="http://www.sitecore.net/identity/claims/isAdmin" value="true"/>
</NewClaims>
</SitecoreDeveloperTransformation>
</ClaimsTransformations>
</AzureAd>
</IdentityProviders>
</ExternalIdentityProviders>
</Sitecore>
</Settings>Once you’ve configured Sitecore Identity to map each Security Group to a role in Sitecore, you can manually copy this file to your Sitecore Identity application in the following directory:
.\sitecore\Sitecore.Plugin.IdentityProvider.AzureAd\Config\
Testing
Once you’ve copied your file, make sure to restart the application, whether it’s local or in Azure. You can now add yourself to each of the Security Groups that you’ve created. This allows you to verify that authentication and authorization are both working as expected.
Summary
We’ve walked through the process for configuring Azure AD and Sitecore Identity to support a full-scale Sitecore development team. Once you’ve created your team, there are just a few small administrative tasks that are required for onboarding new team members or clients.
Team Members
To onboard a new team member, you must invite them to Active Directory and add them to the appropriate Security Group. To off-board a team member you must remove them from Active Directory. Sometimes this will be done for you if the team member is leaving the organization.
New Projects & Environments
When a new project is spinning up, there are two steps for enabling your Sitecore team:
- Copy the
Sitecore.Plugin.IdentityProvider.AzureAd.xmlfile that you’ve configured to your new Sitecore Identity environments. - Add an App Registration for all new Sitecore Identity environments to Active Directory