You many never have to create another Sitecore account again
Introduction
In a previous post, I talked about why Single Sign On is the most important feature to enable early on in a project.
This is part two in a series on how to take Sitecore Identity to the Next Level. This article establishes a foundation by overcoming one of the biggest hurdles in implementing SSO with Azure Active Directory: creating and managing an Azure Active Directory organization, otherwise known as a tenant.
In a later post I’ll show you how to create your own tenant along with users and security groups. This eliminates the dependency on another team to manage a tenant for you, making it easier for your team to get up and running quickly.
If you follow these steps, you could expand on this concept by spinning up multiple Sitecore instances that are connected to the same AD tenant. You may never have to create another Sitecore account again.
Reference
As you are aware, Sitecore is built on Microsoft technologies, which are designed to run in Azure. While this article will give you the basics, I’m a huge proponent of Microsoft’s learning catalog. This gives developers a rich background in the technologies that they are using every day. If you want to review the official learning for Azure Active Directory, I highly recommend the Manage Identities and Governance in Azure learning path, which is part of the Azure Administrator certification path.
Tenant Creation
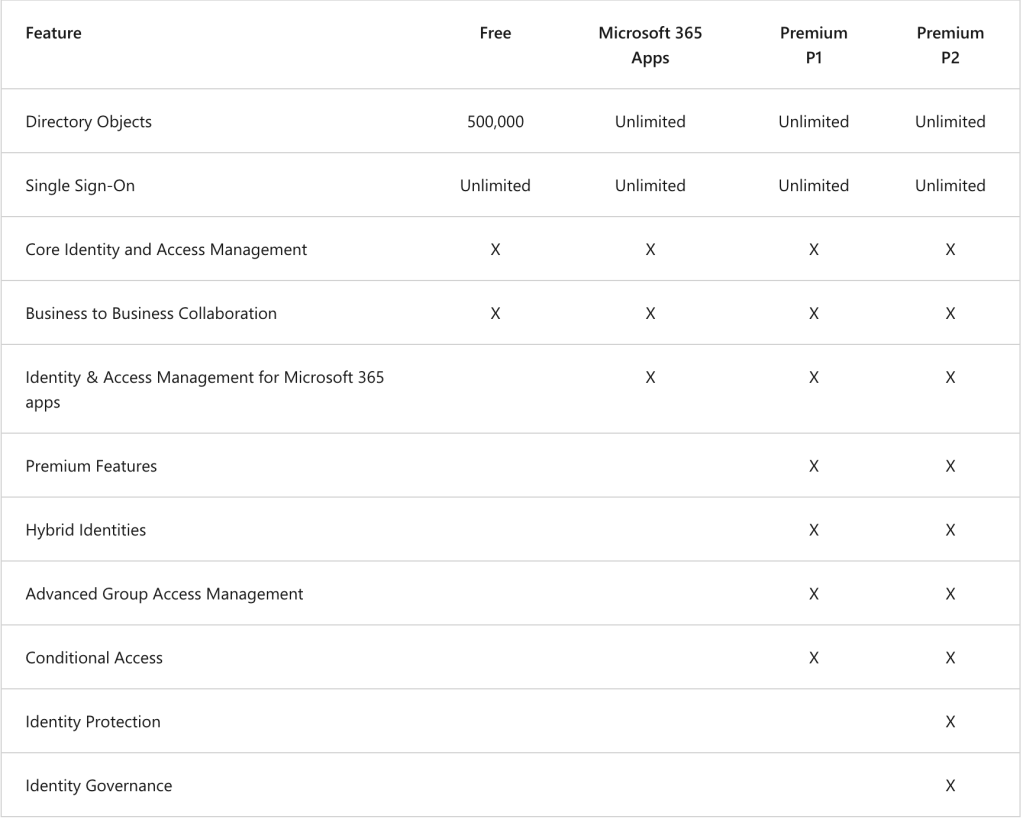
Azure Active Directory has several feature tiers. For the purposes of this demonstration, we only need the feature sets of the Free tier.

- Visit the Azure Portal
- Creating an Azure Active Directory tenant is different from a standard Azure resource. You can access it from your Home screen
 or visit this url: https://portal.azure.com/#blade/Microsoft_AAD_IAM/ActiveDirectoryMenuBlade/Overview
 - You can then select ‘Manage Tenants’, which provides a list of all the Active Directory tenants that you are a member.

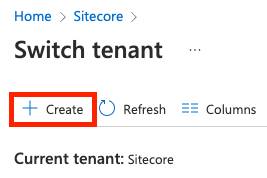
- From here, you can select the ‘Create’ button to create your own tenant

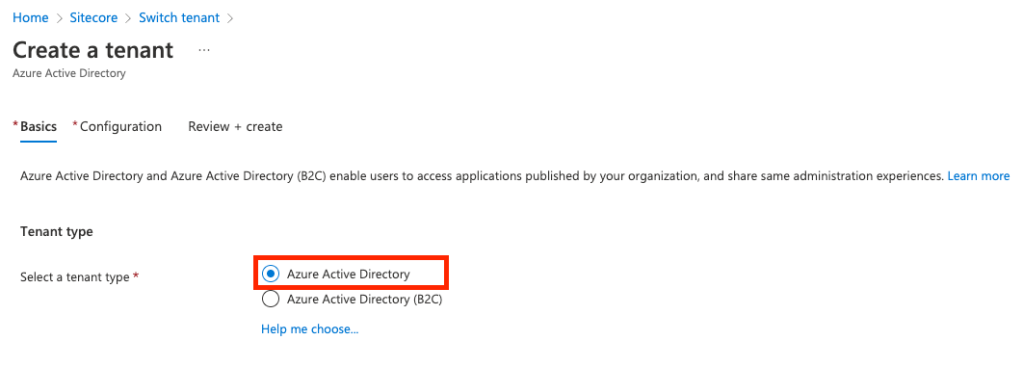
- This will start the tenant creation ‘wizard’ with the Basics. Select ‘Azure Active Directory’

- Click the ‘Next: Configuration’ button
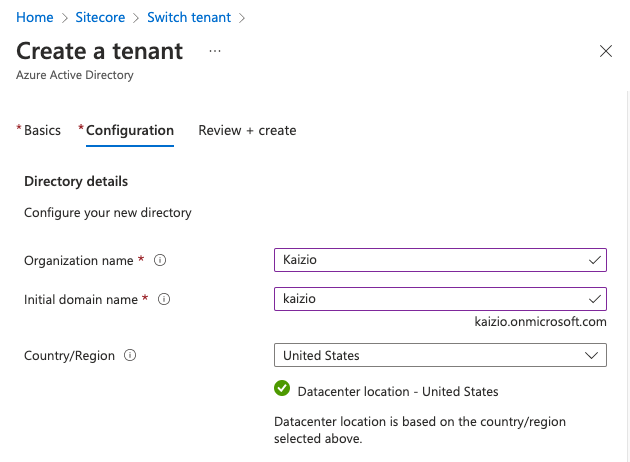
- Enter your organization name and initial domain name. IMPORTANT: The initial domain name field must be unique and will have
.onmicrosoft.comappended to it.
- Select ‘Next: Review + create’
- Double-check your initial domain and then click the ‘Create’ button
In Summary
You now know how to create your own, free Active Directory tenant. You can experiment with some of the premium features or start adding users and groups. A word of caution: Azure AD tenants are foundational. The more you add to it, the harder it is to delete the organization if you don’t need it.
Up Next
- Single Tenant Azure / Multi-tenant Sitecore – setting up users, groups and app registration for a Sitecore development team